What’s In This Guide
- What Actually Happens at These Roof Junctions
- Why These Junctions Are Common Leak Points
- How Roofers Waterproof These Junctions Step-by-Step
- Comparing Valley Flashing Methods
- What Affects Roof Flashing Installation Cost and Timing
- When to Call a Professional Roofer
- Frequently Asked Questions
- Ready to Waterproof the Vulnerable Points on Your Roof?
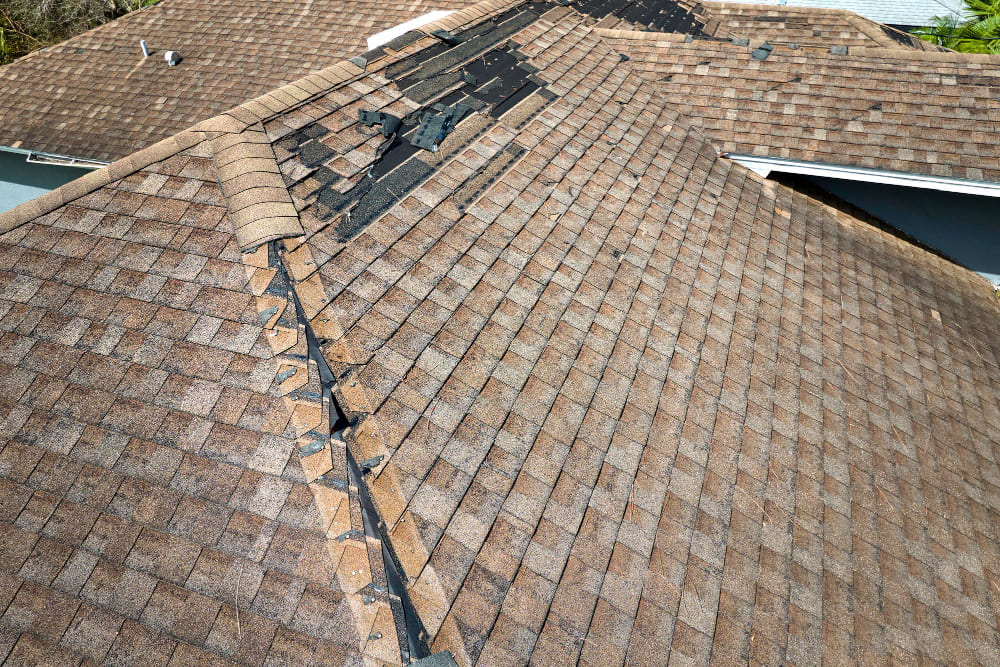
A water stain on a ceiling or wall below a dormer, chimney, or roof valley rarely begins where it appears. It starts at a joint where two roof planes meet or where a vertical wall intersects the roof deck.
These junctions handle higher runoff concentrations than surrounding shingle areas. They are also prone to water intrusion if flashing is damaged, incorrectly installed, or affected by seasonal freeze-thaw cycles in the Hudson Valley.
Quick Facts
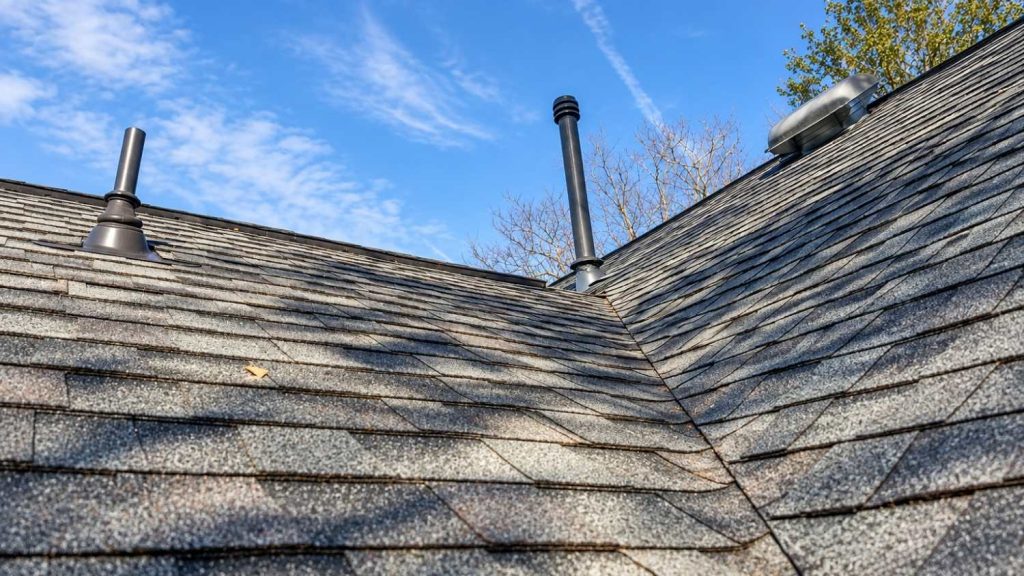
- Roof valleys funnel runoff from adjoining slopes and are typically constructed using open metal, closed-cut, or woven methods depending on shingle type and roof design.
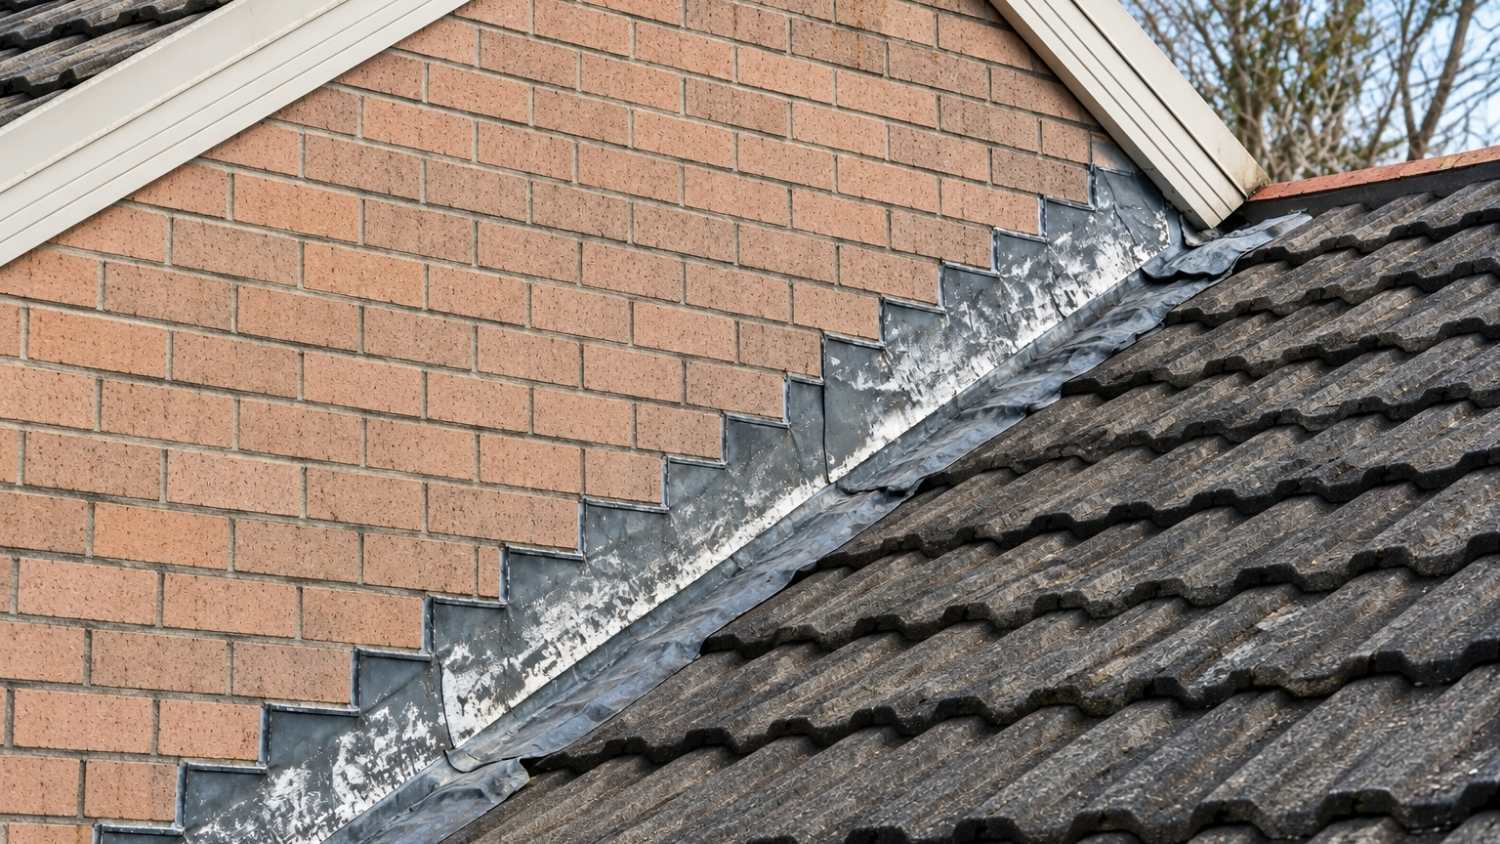
- Step flashing overlaps every shingle course where a dormer or sidewall meets the roof deck.
- The 2025 Residential Code of New York State requires an ice barrier membrane extending at least 24 inches inside the exterior wall line in regions subject to ice damming.
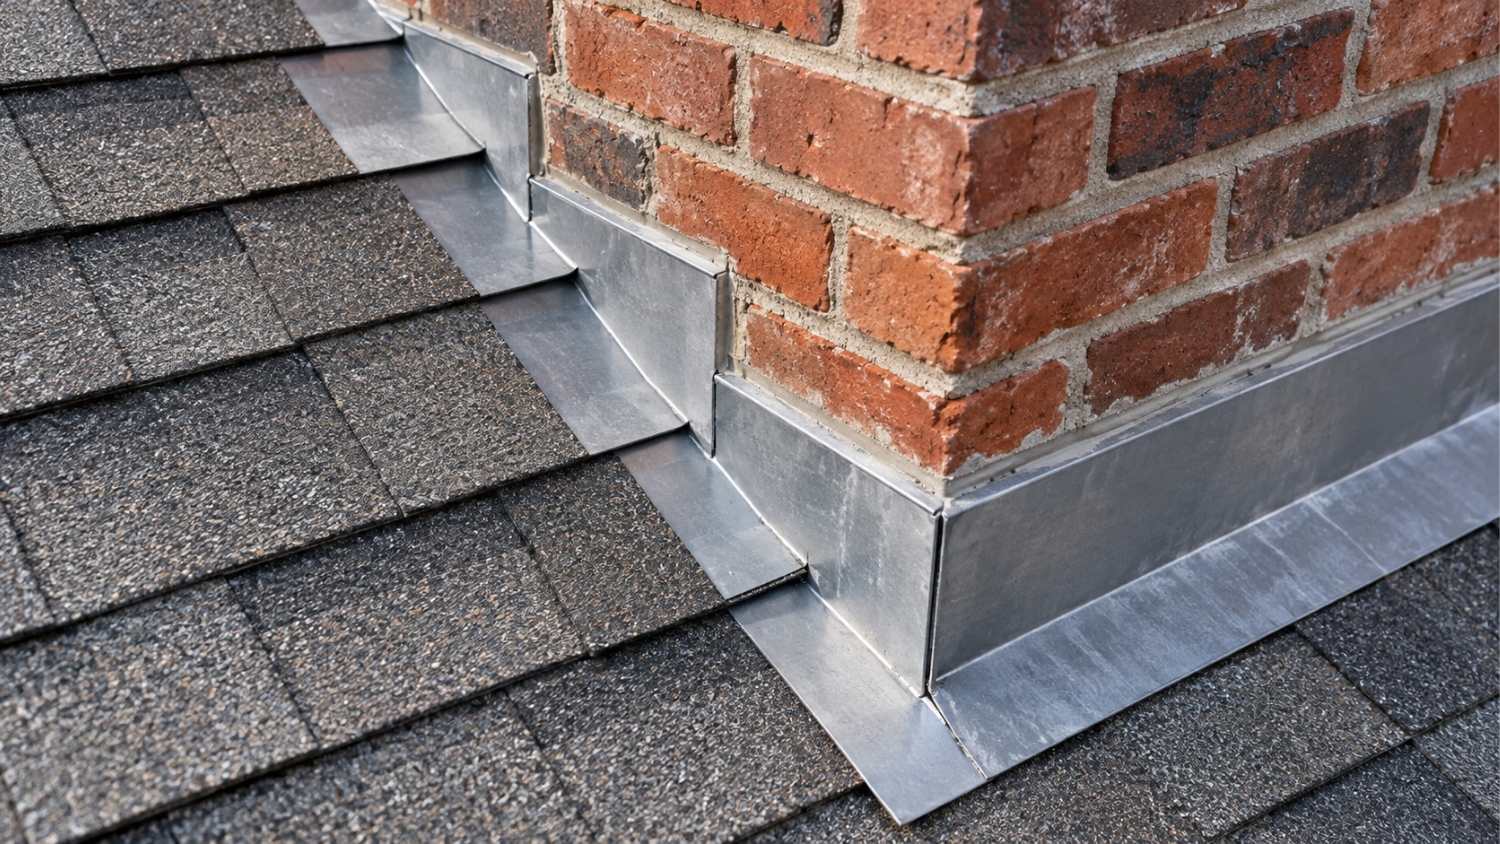
- Counterflashing embeds into chimney masonry to block wind-driven rain.
- Improperly installed or deteriorated flashing is a primary cause of water intrusion at roof transitions.
What Actually Happens at These Roof Junctions
Roofers waterproof valleys, dormers, and roof-to-wall intersections using flashing materials combined with underlayment and shingles integrated into the roof system. Each transition requires a method suited to its geometry and shingle type.
The layering matters more than the flashing itself. Every upper piece of shingle or flashing overlaps the piece below it, so water traveling downhill always meets a lapped edge instead of an open seam. This principle, sometimes called shingle-fashion installation, is the foundation every flashing detail depends on.
Why These Junctions Are Common Leak Points
A flat, uninterrupted roof plane sheds water in a predictable downward path. Junctions interrupt that flow by concentrating runoff, redirecting water, or creating transitions between different building materials.
Roof Valleys: Two Slopes, One Channel
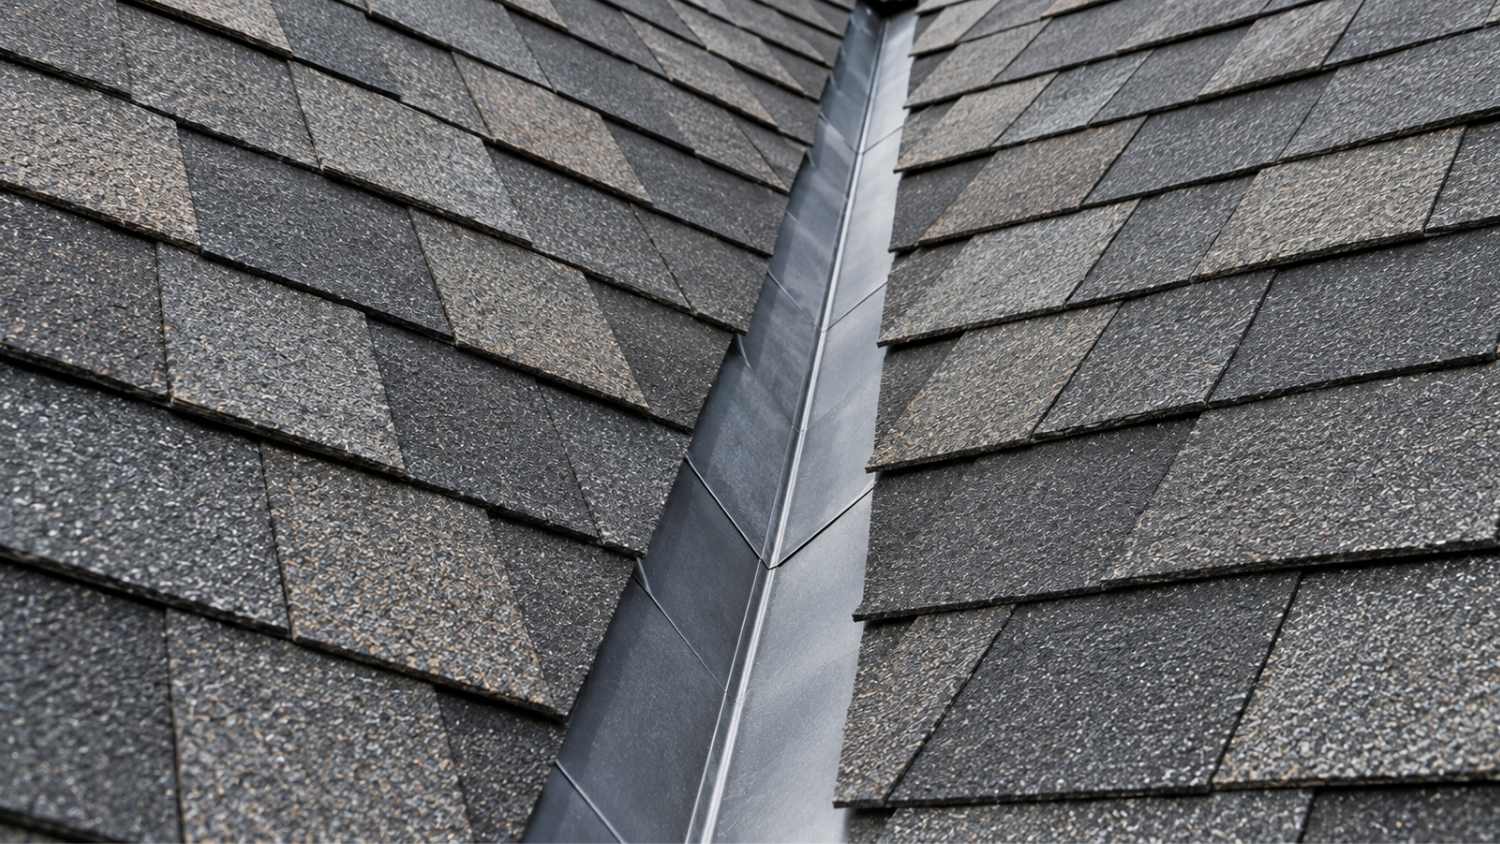
Roof valleys collect runoff from two adjoining roof planes and direct it into a single line. During heavy rain, that channel carries a concentrated flow of water. Any gap, undersized flashing, or debris buildup in a valley can lead to water intrusion.
Dormers and Sidewalls: Where Slope Meets Vertical
Wherever a roof plane meets a vertical wall, whether that is a dormer, an addition, or a chimney, the transition needs flashing that bridges two different surfaces moving at different rates through temperature swings. Step flashing pieces should be nailed only into the roof deck, never into the wall, because nailing to both surfaces lets differential movement pull the flashing apart over time.
Chimneys and Roof Penetrations: Working Around a Fixed Obstacle
A chimney does not move with the roof deck the way plywood sheathing does. Flashing here has to account for a masonry structure that settles differently and expands at a different rate than the surrounding roof. Chimney flashing commonly uses base and step flashing in combination with counterflashing according to manufacturer instructions.
READ MORE: Hyde Park Roof Leak Detection Around Chimneys, Vents, and Flashing
How Roofers Waterproof These Junctions Step-by-Step
Waterproofing a roof junction follows a systematic installation sequence. Installing flashing in coordination with the surrounding roofing materials helps ensure proper water shedding at these critical points.
Step 1: Install Self-Adhering Ice and Water Membrane First
Before any flashing goes down, a self-adhering ice and water membrane is applied at the valley, along eaves, and around penetrations. In New York State, where ice dams are common, this membrane is mandated by building codes. The 2025 Residential Code of New York State requires ice barriers extending from the lowest edges of all roof surfaces to a point at least 24 inches inside the exterior wall line of the building.
Step 2: Install Step Flashing Concurrently With the Shingle Courses
Flashing pieces are woven into each shingle course as the crew works up the roof, not stacked on top after the shingle field is finished. This keeps every layer lapping correctly so water always sheds downhill and over the layer beneath it.
Step 3: Select the Correct Valley Method
Roof valleys are typically finished using one of three approaches:
- Open valley: Metal flashing stays visible down the centerline, offering the clearest sightline for water flow and the easiest visual inspection.
- Closed-cut valley: Shingles from one roof plane run across the valley, and the opposing plane's shingles are trimmed along a chalk line.
- Woven valley: Shingle courses from both planes interlace across the valley with no exposed metal.
Manufacturer guidance from GAF notes that open and closed-cut valleys are compatible with most shingle types, while woven valleys are not recommended for laminated architectural shingles because the extra layering at the fold can crack under stress.
Step 4: Set Step Flashing at Every Sidewall and Dormer Transition
Each step flashing piece is bent to match the roof pitch and installed course by course, with the vertical leg running up the wall beneath the siding and the horizontal leg lapped under the shingle above it. A professional roofing contractor evaluates whether additional details, such as kickout flashing at the base of a wall, are necessary to direct water away from the siding.
Step 5: Install Counterflashing at Chimneys
Base flashing goes in first, secured to the roof deck. Counterflashing is then set into a cut reglet in the chimney masonry and sealed, overlapping the base flashing by several inches so water cannot travel behind it. This two-piece approach lets the roof and chimney move independently without breaking the seal.
Step 6: Seal and Inspect Every Transition
Roofing cement and compatible sealant reinforce flashing edges, but sealant is a backup layer, not the primary waterproofing method. A final walkthrough confirms every valley, sidewall, and penetration has continuous, lapped coverage before the crew leaves the site.
Comparing Valley Flashing Methods
|
Valley Type |
Visibility |
Best Suited For |
Installation & Maintenance Considerations |
|
Open valley |
Exposed metal channel |
Compatible with most asphalt shingle types, heavy runoff areas |
Allows clear visual inspection of metal lining and runoff path |
|
Closed-cut valley |
Shingles cover valley lining; cut edge along centerline |
Compatible with most asphalt shingle types |
Requires precise trimming along chalk line during installation |
|
Woven valley |
Interlaced shingles across centerline |
Standard 3-tab strip shingles |
Per GAF guidelines, woven valleys are not recommended for laminated architectural shingles due to potential stress along folds |
What Affects Roof Flashing Installation Cost and Timing
Flashing costs vary based on the number of junctions on a roof, the metal type specified, roof pitch, accessibility, and whether the project is new flashing during a full replacement or a standalone repair on an existing roof. A home with multiple dormers and a complex roofline naturally requires more flashing detail work than a simple gable roof.
Site conditions also play a role. Hidden decking damage discovered under old flashing, chimney masonry that needs a new reglet cut, or difficult roof access can all extend labor time. Weather conditions matter too, since adhesives and sealants require specific temperature ranges for proper application.
Because every roof and junction count is different, an accurate number comes from an on-site evaluation rather than a general estimate.
When to Call a Professional Roofer
Roof flashing installation is a professional roofing task, not a typical DIY repair project. Step flashing and counterflashing should always be handled by experienced roofing professionals, since improperly installed flashing is a common source of water damage and can contribute to mold growth and structural issues when left unaddressed.
Call a professional when any of these signs appear:
- Water stains on ceilings or attic rafters near a chimney, dormer, or valley
- Visible rust, separation, or lifted edges at flashing joints
- Granule loss or bare metal showing in an open valley
- Daylight visible through the roof deck around a chimney or vent during an attic inspection
- Recurring leaks in the same location after a prior repair
Professional roofers can trace a leak back to its source, since water often travels along rafters before showing up as a stain far from the actual entry point. Any concerns involving structural integrity or local building code compliance should be evaluated by qualified professionals.
Frequently Asked Questions
Can old flashing be reused during a roof replacement?
Existing flashing may sometimes appear reusable, but its condition, fastening points, corrosion, and compatibility with the new roofing system all need to be evaluated. In many roof replacements, new flashing is installed to create a complete, properly integrated waterproofing system.
Can damaged flashing be repaired without replacing the entire roof?
Often, yes. Localized flashing around a chimney, wall, vent, or other penetration may be repairable without a full roof replacement if the surrounding shingles, decking, and underlayment remain in serviceable condition.
What materials are commonly used for roof flashing?
Roof flashing is commonly made from metals such as aluminum, galvanized steel, copper, or stainless steel. The appropriate material depends on the roofing system, surrounding materials, exposure conditions, and manufacturer requirements.
How often should roof flashing be inspected?
Flashing should be checked during routine roof inspections and after severe storms or other events that could loosen roofing components. Older flashing may warrant closer attention if corrosion, sealant deterioration, or previous leak repairs are present.
Does flashing need maintenance even if the roof is not leaking?
Yes. Flashing can loosen, corrode, or develop deteriorated sealant before an interior leak becomes visible. Periodic inspection can identify developing problems at roof joints before water reaches the decking or interior finishes.
Ready to Waterproof the Vulnerable Points on Your Roof?
Valleys, dormers, and roof-to-wall intersections demand precise roof flashing installation, and getting it wrong can mean recurring leaks long after the shingles look fine. Lyndsey Roofing, LLC is a licensed and insured roofing contractor providing professional installation services across the region.
Schedule a roof inspection in Poughkeepsie, NY, to have every valley, dormer, and wall intersection evaluated before small flashing gaps turn into interior damage.