What’s In This Guide
- What Does Drip Edge Actually Do on a Roof?
- Why the Installation Order Matters for Water Shedding
- Signs of a Drip Edge Problem on an Existing Roof
- How a Roof Contractor Installs Drip Edge: Step-by-Step
- Material, Weather, and Code Factors That Affect Drip Edge Performance
- When Should a Homeowner Call a Roof Contractor About Drip Edge?
- Frequently Asked Questions
- Ready to Have Your Roof’s Edge Inspected the Right Way?
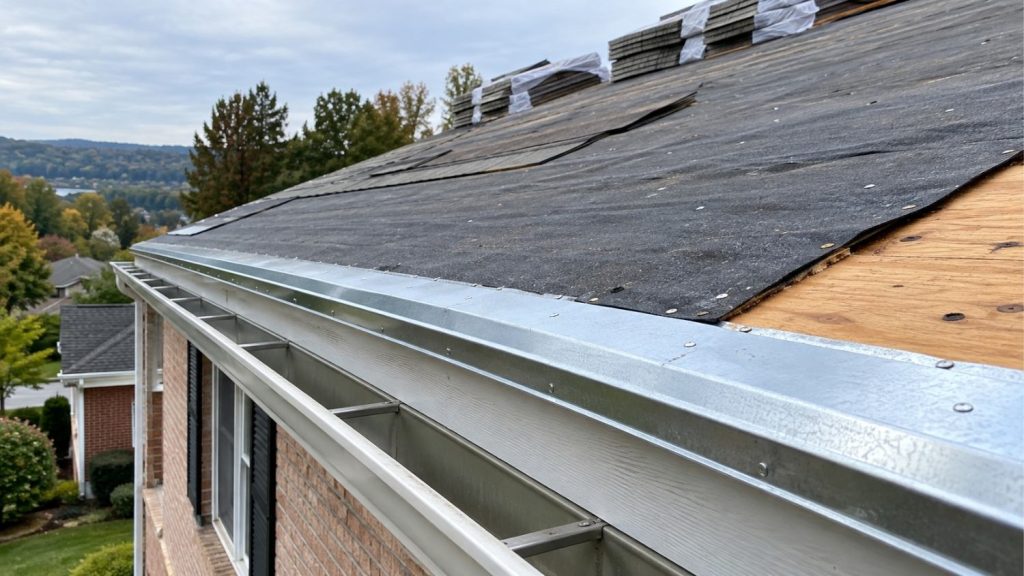
A roof contractor installs drip edge before the main shingle courses because the metal is designed to sit underneath the roofing system at the eaves to perform its function. If drip edge is installed after the shingles, or if it is omitted, water may find a path toward the roof deck instead of the gutter.
When homeowners in Poughkeepsie, NY, observe a roofing crew address the eave line before shingles are laid, they are seeing a standard installation sequence. It is a detail that helps determine how effectively the roof edge manages moisture during the freeze-thaw cycles of a local winter.
Quick Facts
- Correct installation order is a key detail for roof edge performance, as it helps manage water at the eaves and protects the underlayment edge at the rakes.
- The code requires drip edge to extend at least 1/4 inch below the roof sheathing and extend back onto the roof deck at least 2 inches, per the 2025 Residential Code of New York State Section R905.2.8.5.
- Adhering to code-required overlap is essential for maintaining a continuous drip-edge assembly, as adjacent sections must overlap by at least 2 inches.
- A pre-installation inspection allows a roof contractor to evaluate visible eave conditions, including the fascia and existing drip edge, while the decking can be evaluated more thoroughly once the roofing material is removed.
- The installation sequence reverses depending on the roof edge: at the eaves, drip edge is installed on the bare deck before the underlayment, while at the rakes, the drip edge is installed on top of the underlayment to protect against wind-driven rain.
What Does Drip Edge Actually Do on a Roof?
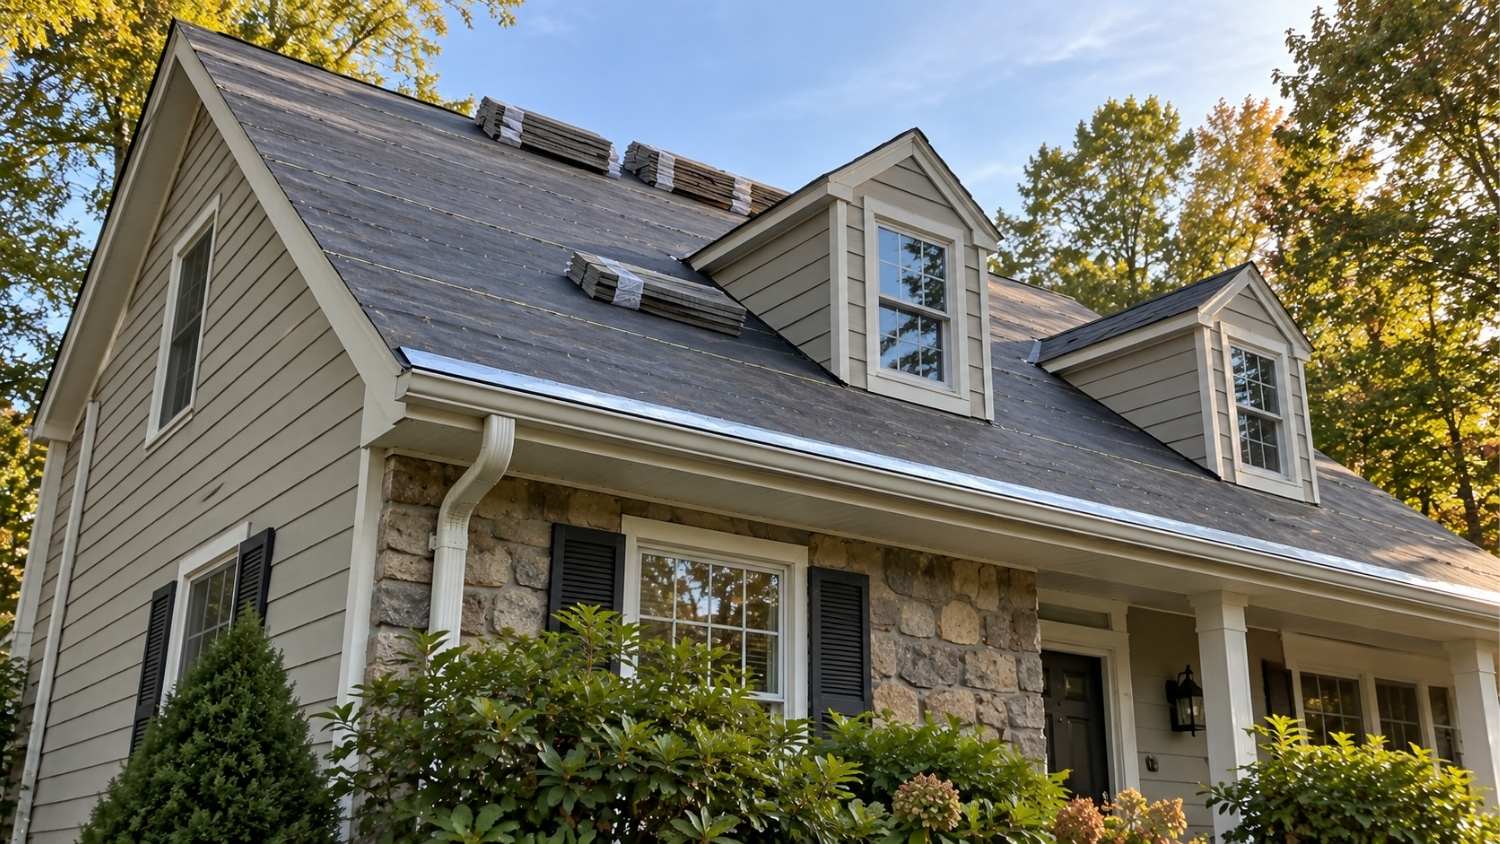
Drip edge is a narrow strip of metal flashing installed along the eaves and rakes of a shingle roof. Where eave flashing is used, drip edge works alongside it to manage water at the roof edge. Drip edge directs water off the roof deck and away from the fascia and, where a gutter is present, into the gutter instead of allowing water to reach the wood edge underneath.
On a residential roof, proper drip edge installation works alongside the underlayment and the shingle field to control how water moves once it reaches the lowest point on the roof plane.
Without drip edge, water can cling to or move back toward the fascia and roof-deck edge instead of being directed cleanly away from the roof assembly. Repeated moisture exposure at the deck edge can contribute to deterioration or rot over time.
Where Drip Edge Sits in the Roof Assembly
A roof is built in layers, and drip edge occupies a specific spot in that stack depending on which edge it protects.
- Decking: The plywood or OSB sheathing that forms the roof's structural surface.
- Drip edge at the eaves: Installed directly on the deck, before the underlayment goes down.
- Underlayment: Laps over the drip edge at the eaves, then tucks under the drip edge at the rakes.
- Drip edge at the rakes: Installed on top of the underlayment along the sloped side edges.
- Shingles: Installed last, starting at the eave and working upward.
This layering is not interchangeable between the two edge types. Eaves and rakes handle water differently, so the drip edge sequence flips depending on which edge a roofing crew is working on.
Why the Installation Order Matters for Water Shedding
The sequence exists because eaves and rakes face water in different ways. Eaves catch the direct downhill flow of every drop that lands on the roof plane. Rakes deal more with wind-driven rain pushed sideways across the slope.
At the eave, the drip edge goes on the bare deck first. The underlayment then laps over the top of it. This lets water that gets under the shingles drain over the drip edge and into the gutter, rather than soaking into the underlayment's cut edge.
At the rake, the order reverses. The underlayment goes down first, and the drip edge is installed on top of it. This protects the underlayment's edge from wind-blown rain and keeps water from getting pushed underneath during a storm.
The 2025 Residential Code of New York State Section R905.2.8.5 mandates that drip edge extend at least 1/4 inch below the roof sheathing and extend back onto the roof deck at least 2 inches. Additionally, adjacent segments must overlap by at least 2 inches. A drip edge that does not meet these specific dimensions or installation sequences may not provide the intended protection over the long term, making proper installation vital for the roof assembly.
Signs of a Drip Edge Problem on an Existing Roof
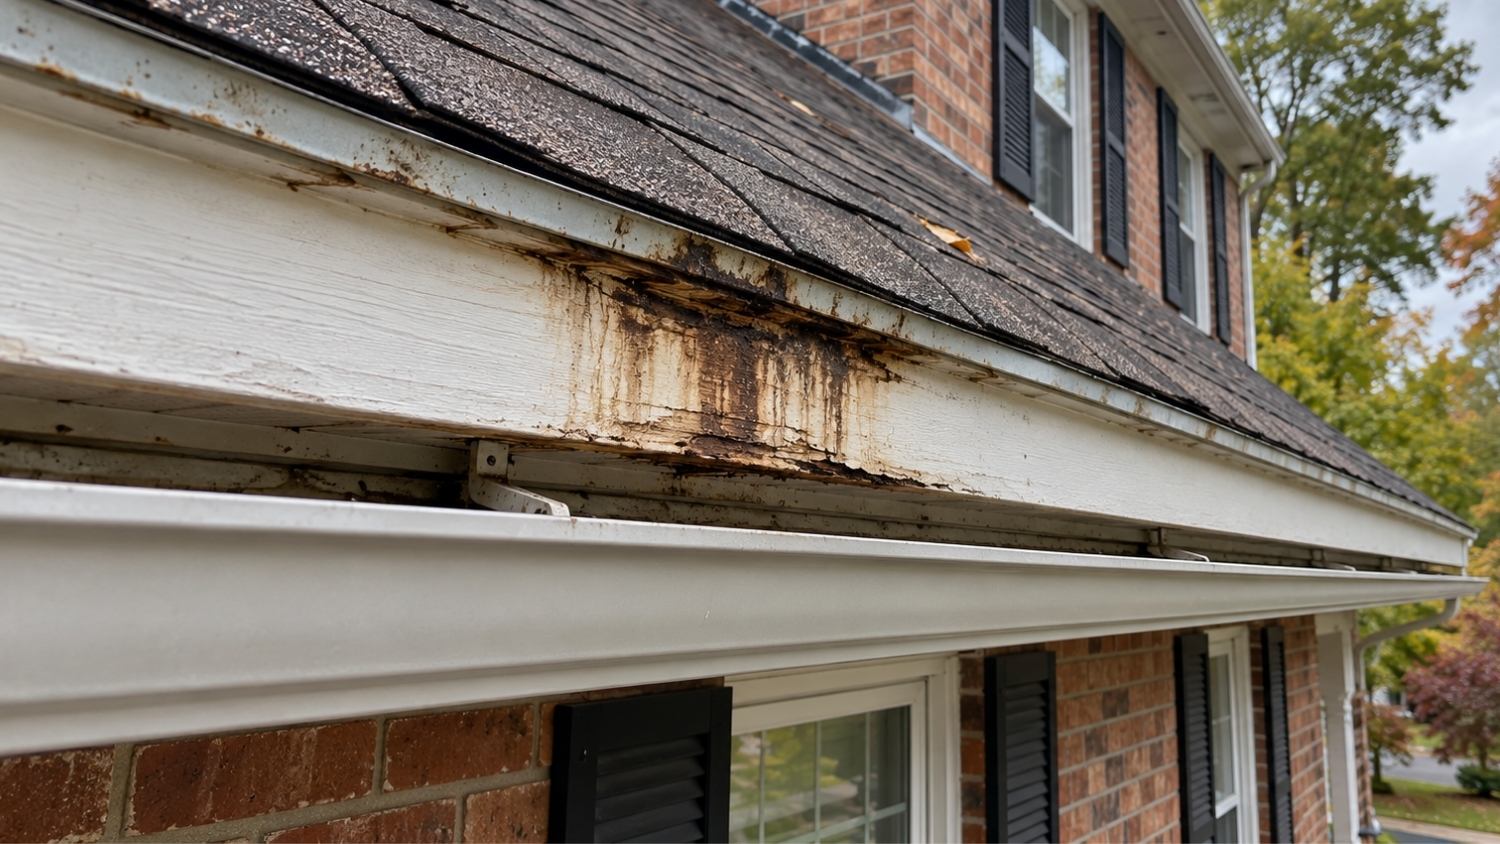
Drip edge failures rarely announce themselves with an obvious leak on day one. Homeowners in Poughkeepsie and across Dutchess County typically notice slower, cumulative signs instead.
- Fascia board staining or soft spots near the roof edge, often visible from the ground with binoculars.
- Water running behind or past the gutter at specific sections, suggesting it is missing the trough entirely.
- Loose, lifted, or visibly displaced drip edge at the roof edge, which can indicate fastening or installation problems.
- Rust streaking or visible corrosion on the metal drip edge, especially on older installations.
- Soft or spongy decking at the eave discovered during a tear-off, which can indicate long-term moisture exposure near the roof edge.
Any one of these signs on its own may not point to a major issue. Combined, they can indicate that the eave assembly should be evaluated by a roofing contractor before a re-roofing project begins.
READ MORE: What Happens During a Roof Replacement? A Hudson Valley Homeowner’s Step-by-Step Guide
How a Roof Contractor Installs Drip Edge: Step-by-Step
Step 1: Complete Tear-Off and Deck Inspection
The old roofing material is removed down to the decking. A roofing contractor checks the exposed deck for soft spots, delamination, or water staining at the eave and evaluates the existing drip edge to determine whether it should be replaced.
Step 2: Install Drip Edge at the Eaves
Where replacement is needed, metal drip edge is fastened directly to the bare deck along the eave line, with sections overlapped by a minimum of 2 inches per code requirements. This step happens before the underlayment goes down at the eave.
Step 3: Install Underlayment Over the Eave Drip Edge
Underlayment is installed over the eave drip edge. Any required ice barrier should be installed in accordance with applicable code and the roofing manufacturer’s instructions. The underlayment lap allows water that reaches this layer to shed over the metal rather than toward the roof edge.
Step 4: Install Drip Edge at the Rakes
Once the underlayment covers the rest of the deck, the drip edge goes down along the rake edges on top of the underlayment. This reversed sequence protects the underlayment from wind-driven rain along the sloped sides of the roof.
Step 5: Install Shingles Starting at the Eave
Starter shingles and field shingles are installed last, beginning at the eave and working upward. The finished shingle courses overlap the drip edge, completing the water-shedding path from roof plane to gutter.
Material, Weather, and Code Factors That Affect Drip Edge Performance
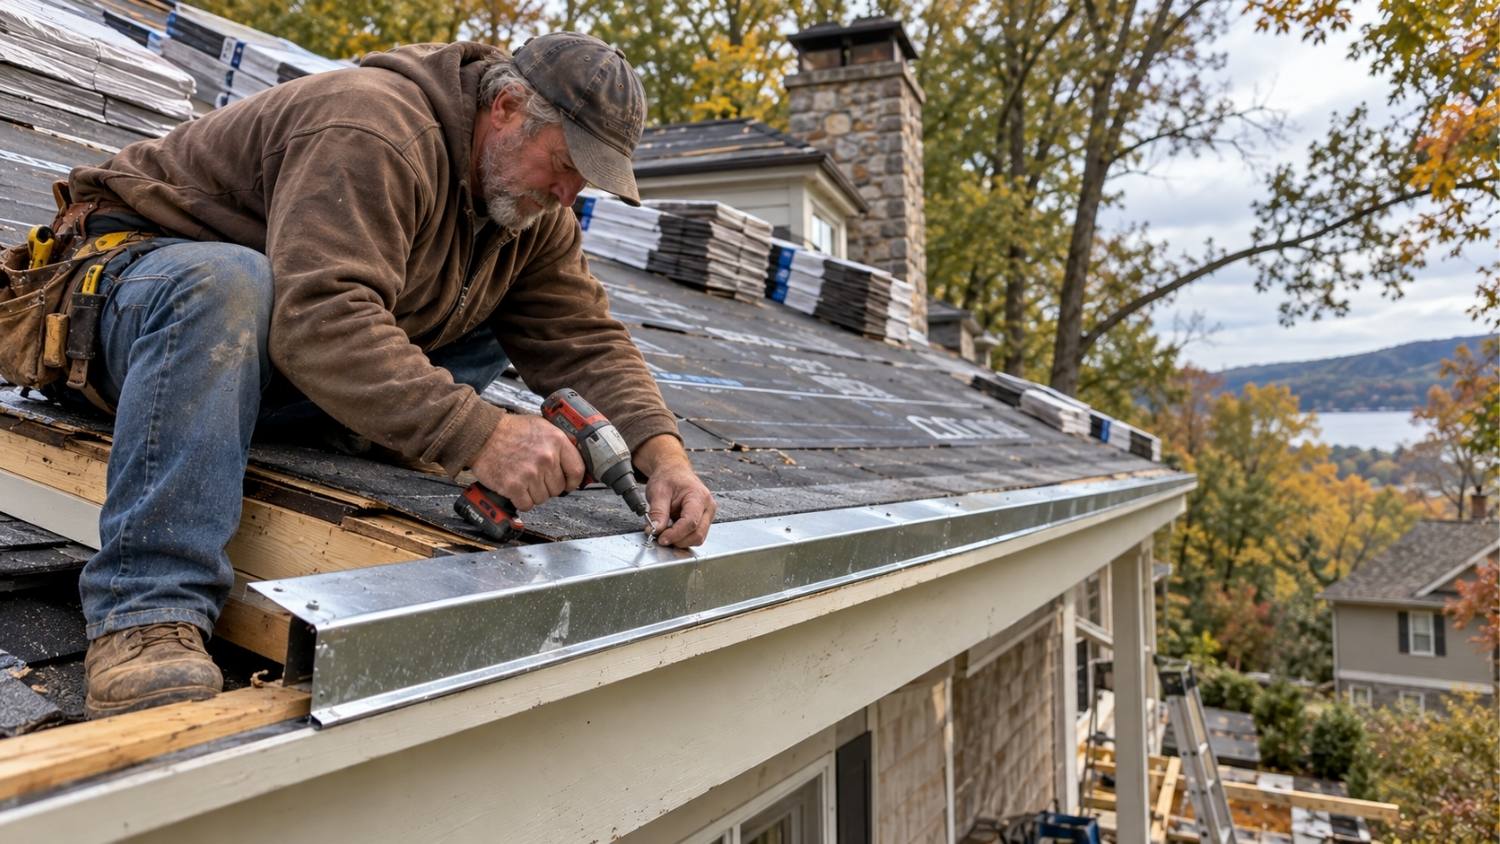
Drip edge is a small component, but several variables affect how well it performs over time in a Hudson Valley climate.
|
Factor |
Why It Matters |
|
Metal gauge and material |
Thin or undersized metal deforms under foot traffic or ice loading, reducing its ability to hold shape and direct water correctly. |
|
Fastener spacing |
Code guidance calls for fasteners spaced no more than 12 inches apart to keep the drip edge secured against wind uplift. |
|
Overlap at seams |
Sections overlapped less than 2 inches create gaps where water can find its way behind the metal. |
|
Freeze-thaw exposure |
Repeated freezing and thawing at the eave, common in Dutchess and Orange Counties, stresses any gap or loose fastening point over time. |
|
Fascia and gutter condition |
Drip edge is designed to direct water away from the fascia and deck edge independently of whether a gutter system is present. |
Because eave conditions, fascia integrity, and roof geometry vary from home to home, the scope of a drip edge repair or replacement can shift depending on what a contractor finds during inspection.
Site access, existing damage, and material availability all factor into an accurate estimate. New York State does not license home-improvement contractors, although some counties and municipalities have local licensing or registration requirements. A written, itemized assessment from a qualified roofing professional can help clarify the project scope before work begins.
When Should a Homeowner Call a Roof Contractor About Drip Edge?
A homeowner should call a roof contractor when fascia staining, water running behind or past the gutter, or visible gaps appear at the roof edge, or anytime a re-roofing project is being planned. Drip edge issues often surface alongside other eave-level concerns that are easier to evaluate together than in isolation.
Common triggers for a professional inspection include:
- Planning a full roof replacement or tear-off
- Noticing water stains on fascia boards or soffits
- Finding soft or discolored decking near the roof edge
- Preparing for winter and wanting eave conditions checked before freeze-thaw season
- Buying or selling a home where roof edge condition is part of the inspection report
Frequently Asked Questions
What is the difference between drip edge and gutter apron?
Drip edge is installed along both the eaves and the rake edges of a roof to direct water off the deck. Gutter apron is a specific type of drip edge profile designed to extend further into the gutter trough at the eave. Many roofing contractors use the terms loosely, but the core function of directing water away from the fascia and deck edge is the same.
Can a roof have drip edge added without a full replacement?
In some cases, a roofing contractor can add or repair drip edge at the eave without tearing off the entire roof, particularly during gutter work or targeted eave repairs. However, proper installation typically requires lifting the first course of shingles and underlayment, so the scope depends on the roof’s current condition and how the original edge was assembled.
Does drip edge affect a manufacturer’s shingle warranty?
Manufacturer requirements vary by product. For example, GAF requires non-corroding metal drip edge at the eaves when a Silver Pledge® or Golden Pledge® Limited Warranty is sought. A contractor familiar with the applicable manufacturer requirements can confirm what applies to your roofing system.
Can existing drip edge be reused during a roof replacement?
Existing drip edge should be evaluated during a roof replacement rather than automatically reused. Bent, corroded, undersized, loose, or improperly installed metal may need to be replaced so the new roofing system can be installed with the correct edge protection and water-shedding sequence. The contractor should assess its condition once the existing roofing materials are removed.
How long does drip edge typically last on a roof?
Drip edge can last a significant portion of a roof’s service life when properly fastened and made from corrosion-resistant material. Its longevity is influenced by local weather conditions and the quality of the initial installation.
Ready to Have Your Roof’s Edge Inspected the Right Way?
Lyndsey Roofing, LLC is a GAF Master Elite-certified contractor and a 2-Star President’s Club award winner serving Poughkeepsie and the surrounding Hudson Valley, with hands-on experience assessing eave assemblies, drip edge condition, and roof edge performance on homes throughout Dutchess, Orange, Putnam, and Eastern Ulster Counties.
Every roof’s edge condition is different, and an accurate assessment starts with a professional look at the eaves, fascia, and drip edge on your specific home.