Embracing solar energy is more than a trend; it’s a practical step in addressing today’s high living costs and environmental challenges. However, installing solar shingles requires your roof to meet certain standards for optimal functionality and efficiency. Here, we outline the key conditions your roof should fulfill and provide insights on how to ensure it’s adequately prepared for a solar upgrade.
Let’s explore the essential preparations for your roof to optimize solar energy generation in Poughkeepsie, New York.
Table of Contents
- The Benefits of Solar Shingles
- Things to Consider Before Installation
- How to Prepare for Solar Shingle Installation
- The Solar Shingle Installation Process
- Frequently Asked Questions
Key Takeaways
|
The Benefits of Solar Shingles
Before delving into the preparation process, let’s take a closer look at the advantages that solar shingles offer to homeowners:
Renewable Energy for a Greener Planet
Solar shingles offer numerous benefits to homeowners, and one of the most significant advantages is their contribution to renewable energy production. These innovative roofing materials harness the power of the sun to generate electricity, reducing the reliance on fossil fuels and the associated carbon dioxide emissions. Solar shingles play a pivotal role in curbing pollution and mitigating the adverse effects of climate change by generating clean, sustainable energy. Homeowners who choose solar shingles are actively participating in the transition to a greener and more environmentally friendly energy source.
Significant Cost Savings
Installing solar shingles on your roof allows you to tap into a consistent and renewable energy source, significantly reducing your monthly electricity bills. Furthermore, many regions provide tax incentives and rebates to homeowners who invest in energy-efficient upgrades like solar shingles. These financial incentives offset the initial installation costs and make solar shingles a financially attractive option in the long run.
Enhanced Aesthetic Appeal
Solar shingles are designed with homeowners in mind, offering a wide range of styles and designs that can seamlessly blend with your roof’s aesthetics. Whether you prefer the classic look of clay tiles or the traditional appearance of asphalt shingles, solar shingles can complement your home’s design while enhancing its curb appeal. This aesthetic advantage makes them a practical choice for homeowners who want to combine sustainability with a visually appealing roofing solution.
Things to Consider Before Installation
Cost Evaluation
Before proceeding with solar shingle installation, assessing the overall cost is vital. Solar shingles typically come with an installation cost of around $21 to $25 per square foot. Homeowners should carefully consider whether this initial investment aligns with their budget. Opting for solar shingles during a roof replacement or new construction project can be more cost-effective in the long run. Over time, the savings on electricity bills can help offset the upfront expenses, making solar shingles a financially viable choice.
Roof Orientation and Efficiency
The efficiency of solar shingles is closely linked to the orientation of your roof. Solar panels and shingles perform optimally when they receive direct sunlight for extended periods. The natural direction of your roof and its exposure to sunlight throughout the day can influence the energy production of your solar shingles. It’s essential to evaluate your roof’s orientation before installation to determine whether it can maximize the benefits of solar energy.
Roof Replacement and Aesthetic Impact
Solar shingle installations may require addressing the entire roofing material for repairs or replacements. This could impact the visual appearance of your roof. Furthermore, replacing roofing materials can vary, ranging from $195 to $1,208 per square foot. Thus, it’s wise to consider potential future maintenance and replacement costs when contemplating solar shingles. Being prepared for unforeseen expenses ensures you can make an informed decision regarding their installation.
How to Prepare for Solar Shingle Installation
Now that you understand the benefits and considerations, it’s time to prepare your roof for solar shingle installation. Follow these meticulous steps to ensure a successful and hassle-free process:
1. Prepare Your Budget
Creating a well-thought-out budget is a crucial initial step when preparing for solar shingle installation. An effective budget not only helps you estimate costs accurately but also allows you to save money and prioritize essential aspects of the project.
Here are some tips to consider when crafting your budget:
- Start Early: Commence your budgeting process at the beginning of the month or even earlier. This early start provides ample time to gather information, research costs, and make informed decisions.
- Prioritize Categories: Begin your budget by listing the most critical categories, such as materials and labor costs. By prioritizing these key elements, you ensure that your budget addresses the most significant expenses upfront.
- Establish a Schedule: Create a timeline for your solar shingle installation project and stick to it. A well-defined schedule helps in planning and ensures that you allocate funds appropriately for each installation phase.
- Monitor Progress: Regularly track the progress of your budget and make necessary adjustments. Keep an eye on expenses to ensure they align with your financial plan. If unforeseen costs arise, you can adjust your budget accordingly.
- Reserve for Contingencies: Always set aside a portion of your budget for unexpected expenses that may crop up during installation. This contingency fund acts as a safety net, providing financial flexibility to address unforeseen challenges without derailing your project’s progress.
2. Consult Roofing Professionals
Before proceeding with your solar shingle installation, it is imperative to consult roofing professionals for a comprehensive roof assessment. This crucial step ensures the safety and effectiveness of your installation project.
Here’s why you should seek their expertise:
- Expert Evaluation: Roofing professionals possess the expertise to thoroughly evaluate your roof’s integrity. They consider factors like the roof’s design, age, and condition, ensuring it can support the added weight of solar shingles without compromising its structural integrity.
- Prevent Issues: Their assessment helps identify and prevent potential problems during and after installation, such as leaks, damage, or the need for unexpected repairs.
Tips When Choosing Roofing Professionals
When selecting roofing professionals for your assessment, consider the following tips:
- Research and Compare: Take the time to research and compare different roofing professionals. Read online reviews and gather price quotes from reputable experts in your area.
- Check Credentials: Ensure the professionals you choose are licensed, insured, and certified. This guarantees their qualifications and adherence to industry standards.
By following these guidelines and consulting trusted roofing professionals like Lyndsey Roofing, LLC, you can confidently proceed with your solar shingle installation project, knowing your roof’s structural integrity is in capable hands.
3. Inspect Your Roof
Before embarking on your solar shingle installation in Poughkeepsie, NY, conducting a thorough roof inspection is crucial to ensure its readiness for installation. By addressing any pre-existing damage, broken shingles, or potential leaks, you can avoid complications down the road.
Here’s a checklist to guide your roof inspection:
- Check for Cracked Caulk: Examine the areas where caulk is applied, such as around vents and chimneys, for any cracks or deterioration. Damaged caulk can lead to leaks, so it’s essential to repair or replace it as needed.
- Inspect for Rust Spots on Flashing: Flashing is vulnerable to rust over time. Inspect all flashing components, including those around roof penetrations, to identify any rust spots. Replace any corroded flashing to maintain a watertight seal.
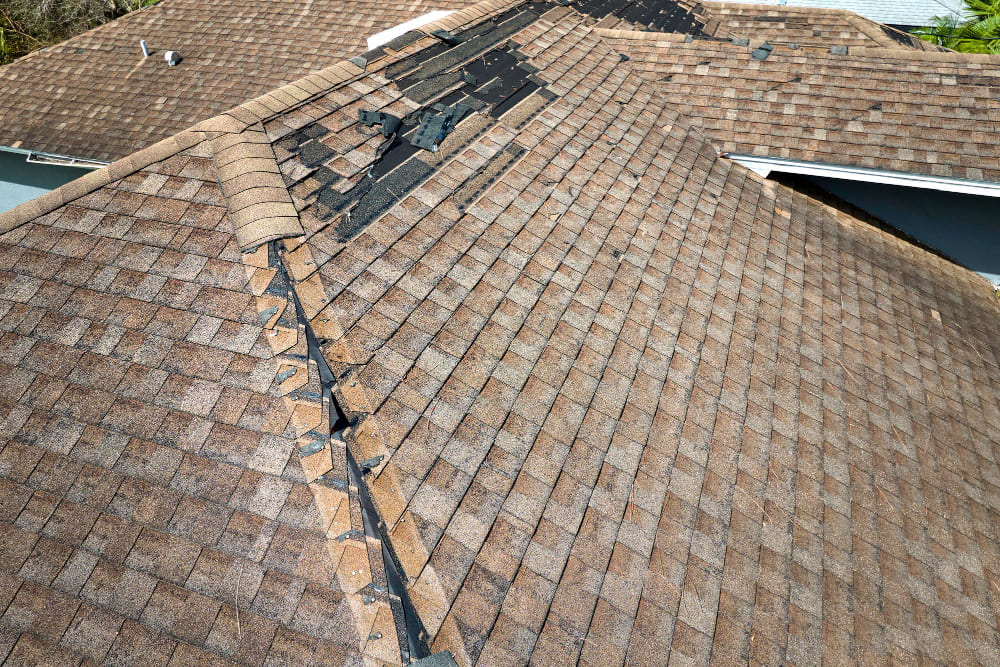
- Examine Shingles: Inspect the shingles for signs of wear and tear, such as buckling, curling, or blistering. Damaged shingles should be replaced to ensure the roof’s integrity.
- Verify Chimney Cap: Ensure your chimney has a properly installed cap to prevent debris and moisture from entering. A chimney cap can extend the life of your chimney and roof.
- Check for Moss or Lichen Growth: Masses of moss or lichen can trap moisture and damage your roof. Safely remove these growths to prevent potential issues.
4. Clear Your Gutters
One essential aspect of roof maintenance, often overlooked, is clearing your gutters. When gutters become clogged with dirt and debris, water can accumulate, potentially leading to mold, mildew growth, and even structural damage.
Here’s how to effectively clear your gutters:
- Safety First: When cleaning your gutters, prioritize safety. Ensure that your ladder is on a stable base and positioned correctly to reach your gutters. Always follow safety guidelines to prevent accidents or injuries while working at heights. Regular gutter maintenance helps safeguard your roof and solar shingles from potential water-related issues and improves long-term performance.
- Scoop Debris: Begin by scooping up dirt, leaves, and debris from your gutters. Use a garden trowel or a specialized gutter scoop for this task. Dispose of the collected waste properly to avoid further blockages.
- Dispose Responsibly: If the debris in your gutters is dry and consists mainly of leaves, consider adding it to a compost pile. Composting can be an eco-friendly way to dispose of organic material while enriching your garden soil.

5. Seasonal Roof Maintenance
Regular and seasonal maintenance is crucial to ensure the longevity of your roof and the optimal effectiveness of your solar shingles. Here’s a breakdown of specific tasks to consider throughout the year:
Winter
- During winter, inspecting your roof for any damaged shingles is essential. Replace them promptly to maintain the roof’s integrity and prevent leaks.
- Seal flashing vents to prevent cold air and moisture from entering your home, helping to maintain a comfortable indoor environment.
Spring
- In the spring, thoroughly examine your roof for signs of wear and tear, including cracks, fractures, and leaks. Address any issues promptly to prevent further damage.
Summer
- Summer is an ideal time to replace loose or lifted shingles to ensure they are securely in place.
- Remove mold or algae growth on your roof’s surface to maintain its appearance and functionality.
- Trim overhanging tree branches that may shade your solar shingles, ensuring they receive maximum sunlight exposure for energy generation.
Fall
- As autumn approaches, clear your gutters of fallen leaves and debris to prevent clogs and water accumulation.
- Consider scheduling a professional roof inspection in the fall to identify and address any hidden issues before winter sets in.
6. Measure the Area of Your Roof
Before your solar shingle installation begins, measuring your roof’s total area accurately is crucial. This step is essential for calculating the solar shingles required and ensuring a successful installation.
Here are some guidelines to follow when measuring your roof:
Accurate Measurement
Use a tape measure or a laser measuring tool to obtain precise measurements. Ensure you measure the entire roof surface, accounting for any irregularities or angles.
Safety Precautions
- For steep or high roofs, it’s advisable to seek professional assistance from roofing experts like Lyndsey Roofing, LLC, to avoid safety risks.
- Choose a clear, calm, and cool weather day for measurements to ensure safety and accuracy.
- Wear soft rubber-soled shoes to prevent damage to your roof’s surface and maintain your footing.
- Keep your footwear clean to avoid tracking mud or dirt on your roof.
- Rope off or mark your work area on the roof to enhance safety and prevent accidents during the measuring process.
7. Trim Overhanging Tree Branches
Inspect your surroundings for overhanging trees that may cast shadows on your house, potentially affecting solar energy production. Trim any branches that block direct sunlight to ensure maximum energy efficiency.
Follow these steps to cut down larger branches safely:
- Initial Inspection: Check for any branches directly obstructing sunlight to your solar shingles.
- Safety Precautions: Ensure safety measures are in place. Wear protective gear and ensure that the area below the branch is clear.
- Undercut Technique: Start with a shallow cut on the underside of the branch. This prevents the bark from tearing down the trunk.
- Top Cut: About 2-3 inches away from the undercut, slice through the branch from the top. This two-cut method helps manage the weight of the falling branch and prevents damage to the tree.
- Final Cut: After removing the main weight of the branch, a stub might remain. Carefully cut this stub outside the branch collar (the swollen area where the branch meets the trunk). This is important for the tree’s health, allowing for proper healing.
- Cleanup and Disposal: Safely dispose of the removed branches, ensuring they’re not left to obstruct pathways or other areas.
8. Reposition Roof Vents and Antennas
When preparing your roof for solar shingle installation, addressing potential obstructions such as roof vents, antennas, and satellite dishes is important. These fixtures can interfere with the optimal placement and functioning of solar shingles.
Here’s a detailed approach to manage this issue:
- Assessment: Carefully survey your roof to identify the exact locations of vents, antennas, and satellite dishes. Understand how they might obstruct the solar shingles.
- Alternative Locations: Determine potential new positions for these fixtures. The new locations should not interfere with solar shingles while ensuring the fixtures function effectively.
- Local Building Codes: Research and adhere to local building regulations regarding relocating roof fixtures. Compliance with these codes is crucial for legal and safety reasons.
- Professional Consultation: Moving these fixtures often requires professional skills, especially when dealing with complex roofing or electrical systems. Consult with licensed contractors in Poughkeepsie, NY, like Lyndsey Roofing, LLC, who specialize in such tasks.
- Plan Execution: Once you have a plan and the necessary permissions, relocate the fixtures. Ensure the process is done safely and efficiently, minimizing any risk of damage to the roof or the fixtures.
- Post-Relocation Check: After relocation, check the functionality of the moved fixtures and the roof’s integrity. Ensure everything is secure and operational.
- Documentation: Record all changes made for future reference, especially if the modifications involve structural changes to the building.
The Solar Shingle Installation Process
Properly preparing your roof, you can embark on the solar shingle installation journey. Here’s an overview of the installation process:
1. Site Assessment
At the outset, an inspector will visit your property to assess your specific needs. Subsequently, a contractor will design your solar shingle system based on your home’s unique features. Any potential hindrances to the installation will be identified and addressed during this phase.
2. Permitting
Your contractor will submit your solar shingle system design to the relevant government authorities for permitting. The approval timeline may vary depending on location, but your contractor will guide you through the process and clarify the expected duration.
3. Solar Panel Installation
Upon receiving the necessary permits, your solar contractor will commence the installation process. This involves ordering the solar panels or shingles, ensuring the structural integrity of your roof, and installing the requisite wiring and mounting equipment. The solar sheets will then be placed and connected to complete the installation.
4. Government Inspection
Before activating your solar shingles, a government inspector will conduct a final inspection to ensure the installation has been carried out correctly. Additionally, they may install a net meter to monitor production and allow your home to send excess power back to the grid.
5. Activation
Upon successful inspection, you can activate your solar shingles, harnessing the power of solar energy to benefit your home and the environment.
Frequently Asked Questions
Are there any maintenance requirements for solar shingles?
Yes, like traditional solar panels, solar shingles require some maintenance. While the blog briefly touched on clearing gutters and seasonal roof maintenance, it’s essential to check for debris accumulation on the shingles periodically. Additionally, you may need to clean the shingles to ensure maximum energy production.
Can I install solar shingles on a flat roof?
Solar shingles are generally designed for sloped or pitched roofs. If you have a flat roof, you may need to explore alternative solar solutions, such as solar panels mounted on racking systems.
What happens if one of the solar shingles gets damaged?
If a solar shingle becomes damaged, it can affect the efficiency of your system. Unlike traditional panels, where a single damaged panel can be replaced with solar shingles, replacing an individual shingle can be challenging. It may require professional assistance, and additional costs could be associated with it.
Do solar shingles work during power outages?
Solar shingle systems are typically grid-tied, which means they rely on the grid for power. Most standard solar shingle systems will not operate during a power outage unless equipped with a battery backup system. However, this was not discussed in the blog.
How long do solar shingles typically last?
Solar shingles are designed to be durable and long-lasting. While the blog touched on the need to replace the entire roof for certain solar shingle brands, it’s worth noting that solar shingles often come with warranties ranging from 25 to 30 years, indicating their expected lifespan. However, individual performance may vary based on weather conditions and maintenance.
Take the First Step Towards Sustainable Energy with Lyndsey Roofing, LLC!
As you prepare your roof for installing solar shingles in Poughkeepsie, NY, you are taking a significant step toward harnessing clean and renewable energy while reducing your environmental footprint and saving on electricity bills. To embark on this journey towards sustainability, partnering with a trusted expert is essential. Lyndsey Roofing, LLC, the leading roofing company that provides roofing solutions in Poughkeepsie, is your go-to source for top-quality solar shingles and expert guidance throughout the process.
If you have any further inquiries or require assistance, please do not hesitate to give us a call. Your eco-friendly and cost-effective solar solution is just a phone call away!